
DIY Guide: Crafting Customizable Chroma Garden LEDs with Nanomaterial Technology
DIY Guide: Crafting Customizable Chroma Garden LEDs with Nanomaterial Technology
Quick Links
- Before We Begin: Here’s What You Need
- Step 1: Download and Print the Enclosure
- Step 2: Prepare the LEDs
- Step 3: Make the Circuit Connections
- Step 4: Attach the Raspberry Pi and Loop Wires
- Step 5: Complete the Circuit and Add Diffusers
- Step 6: Program Your Pi With the Complete Code
- Additional Tips and Tricks
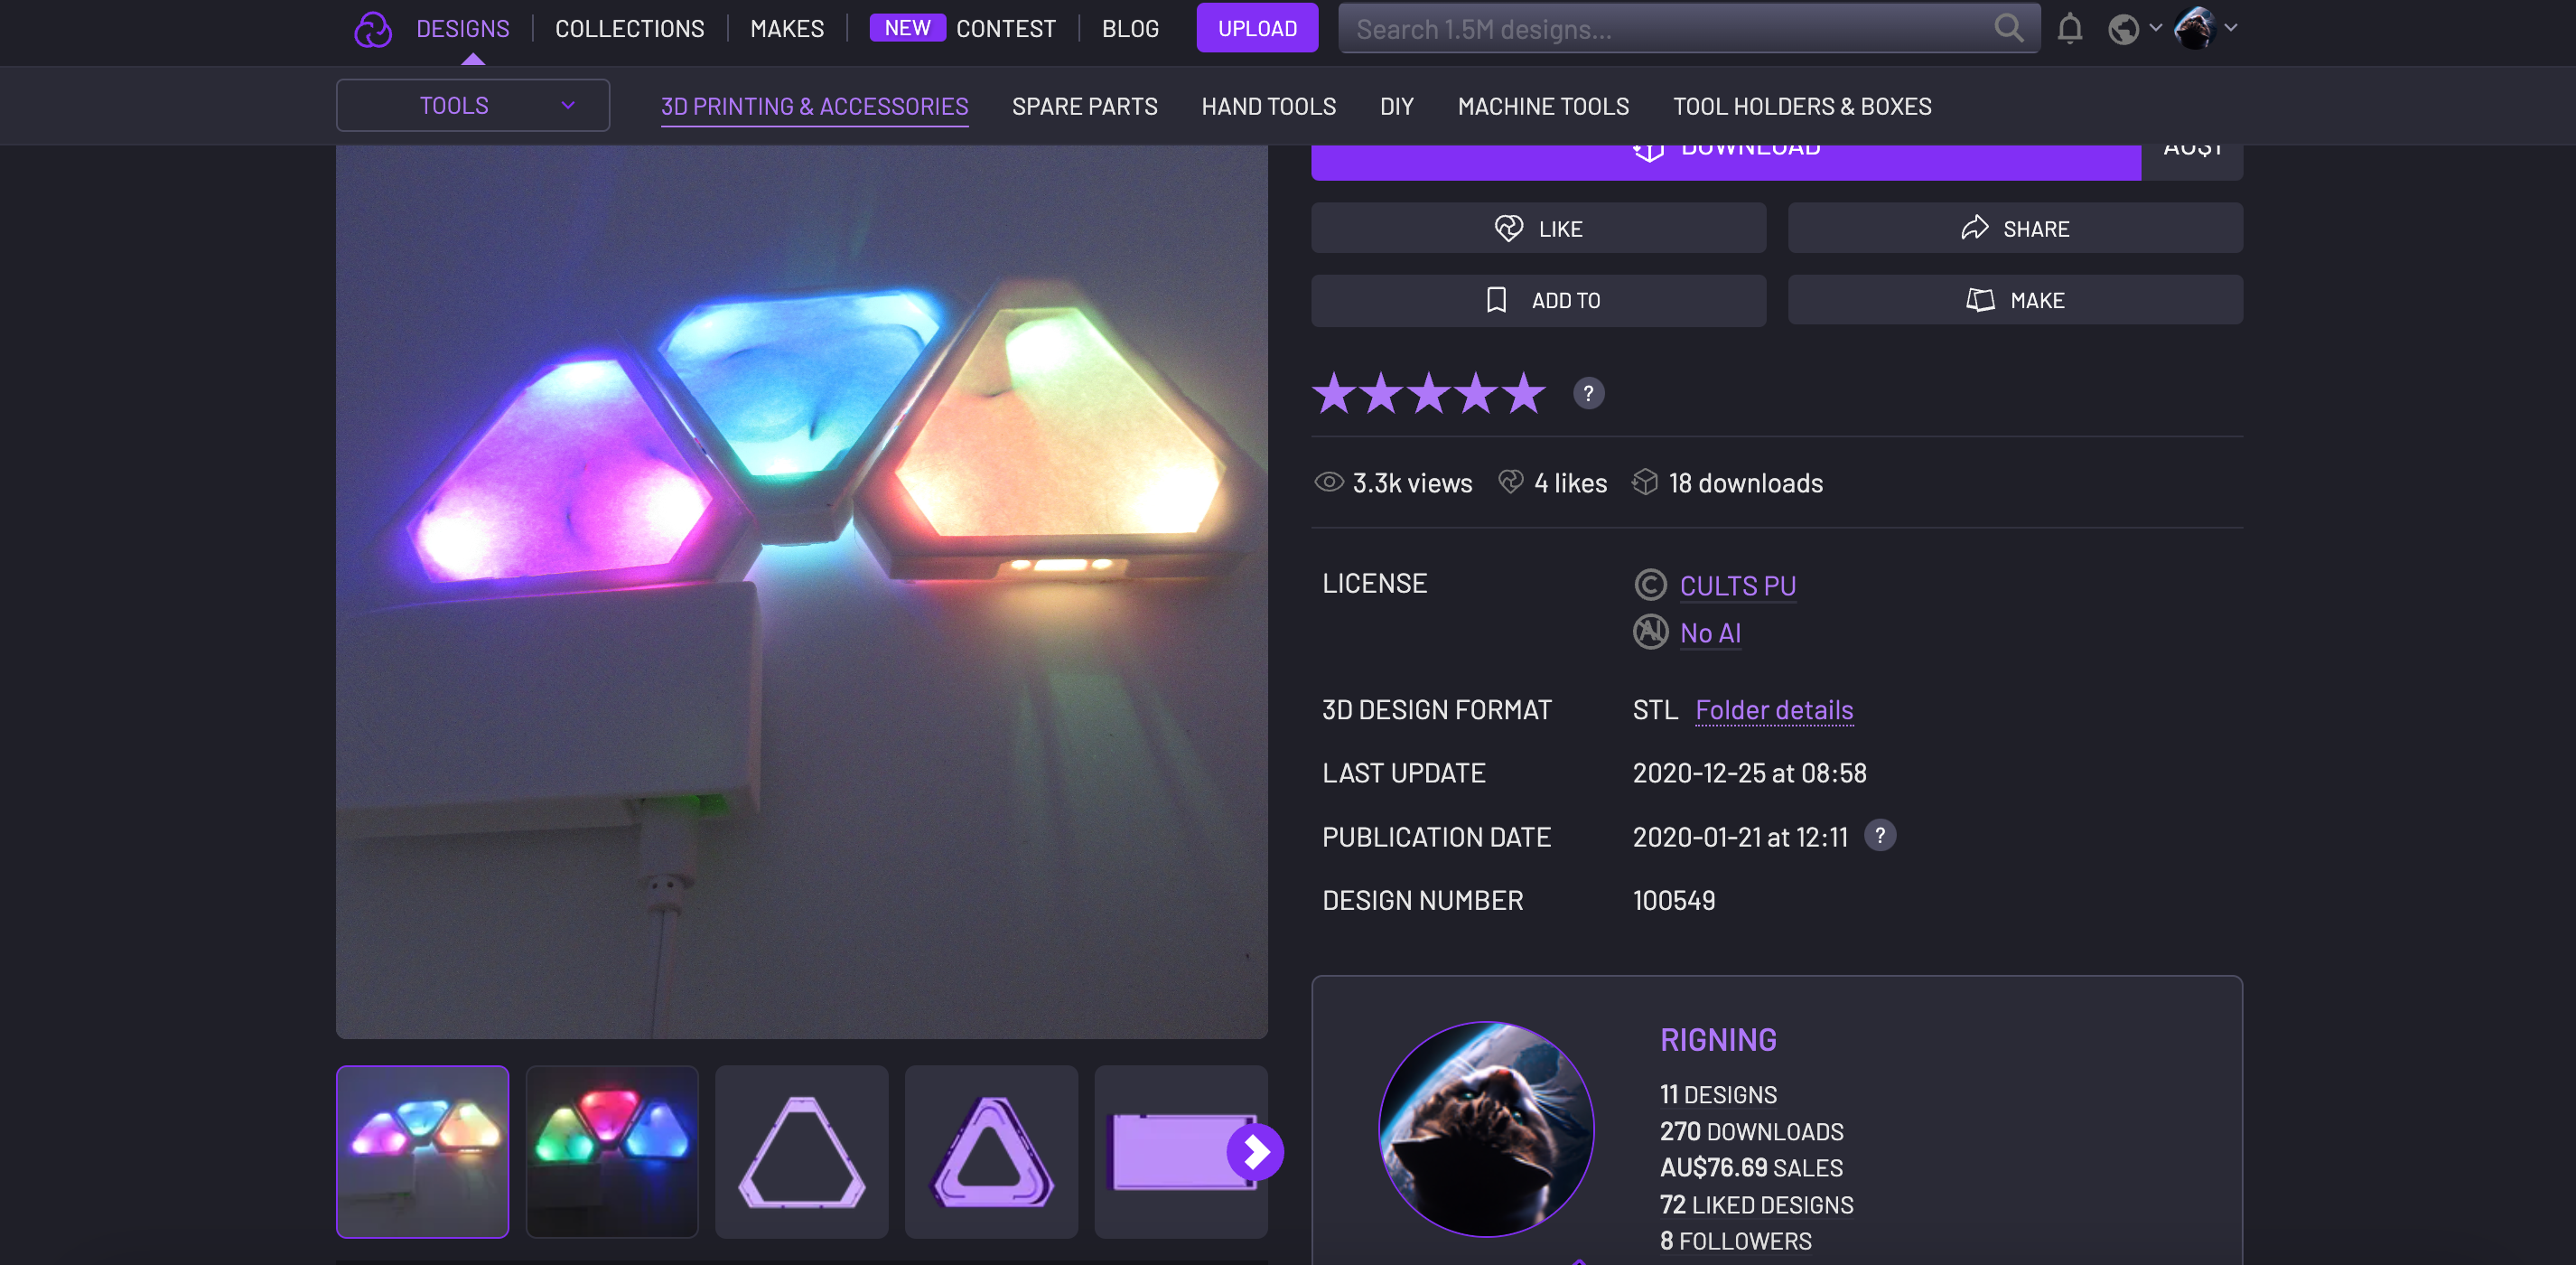
Imagine transforming a simple room into a vibrant space with dynamic lighting effects. Nanoleaf light panels have become a popular choice for achieving this, offering a unique blend of functionality and aesthetics. But what if you could build your own mini replica for much cheaper controlled by the power of a Raspberry Pi?
This guide takes you through the exciting process of creating your very own mini Nanoleaf with a Raspberry Pi Zero W. While it requires some experience with soldering and 3D printing, the satisfaction of building and customizing your own light display is well worth the effort.
Before We Begin: Here’s What You Need
This project is geared towards those comfortable with basic electronic tinkering. Having some experience with soldering and 3D printing will definitely give you a head start. If you’re new to these areas, don’t worry! There are plenty of online resources and beginner guides available to help you get familiar with the tools and techniques.
Alongside a little experience with soldering and 3D printing, you’ll also need to get your hands on this gear:
- A Raspberry Pi Zero W
- A 3D printer with STL files for the enclosure
- TrinityPixel LED strips (nine individual LEDs are needed)
- Jumper wires
- Resistors (depending on LED strip requirements)
- Basic electronic components (soldering iron, solder, helping hands)
- White printer paper
Let’s get building!
Step 1: Download and Print the Enclosure
First, you’ll need to download the STL files for the enclosure components . These include three mini base/top plates and one each of the box enclosure top and bottom.
Once downloaded, print all the parts according to your 3D printer’s instructions. There are also workarounds to 3D print stuff without your own printer .
Step 2: Prepare the LEDs
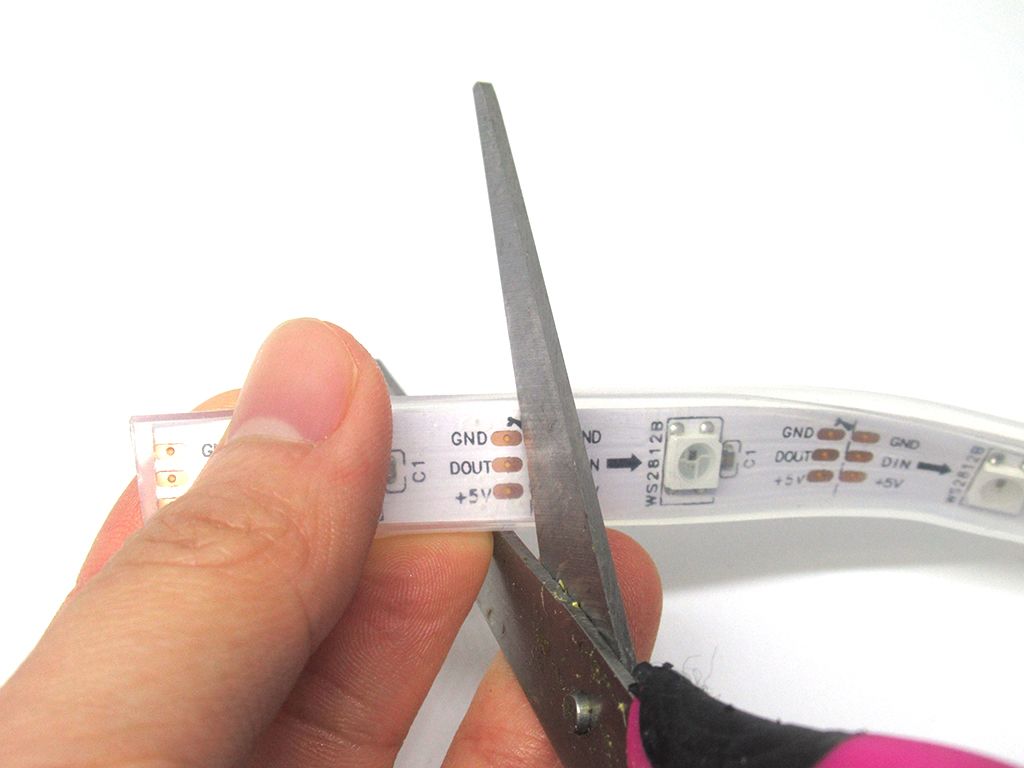
Cherie Tan / How-To Geek
Using sharp scissors, carefully snip the LED strips along the designated cut lines. For this project, you’ll need exactly nine individual LEDs. Be mindful not to cut in between the designated markings, as this can damage the strip.
Many LED strips come with a waterproof coating. If yours does, you’ll need to carefully remove a small section of the coating from the soldering pads before proceeding.
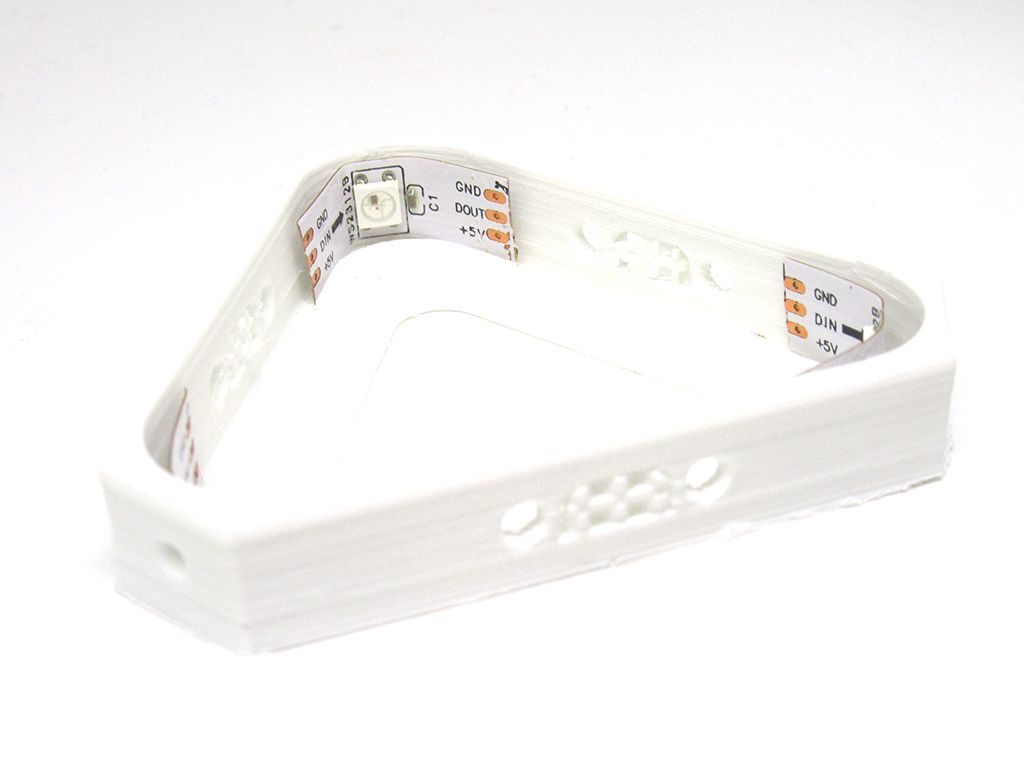
Cherie Tan / How-To Geek
Now comes the fun part: building the LED layout! Gently bend each LED to fit snugly in the corners of the bottom enclosure. Take your time here to ensure clean and even distribution of the LEDs.
Step 3: Make the Circuit Connections
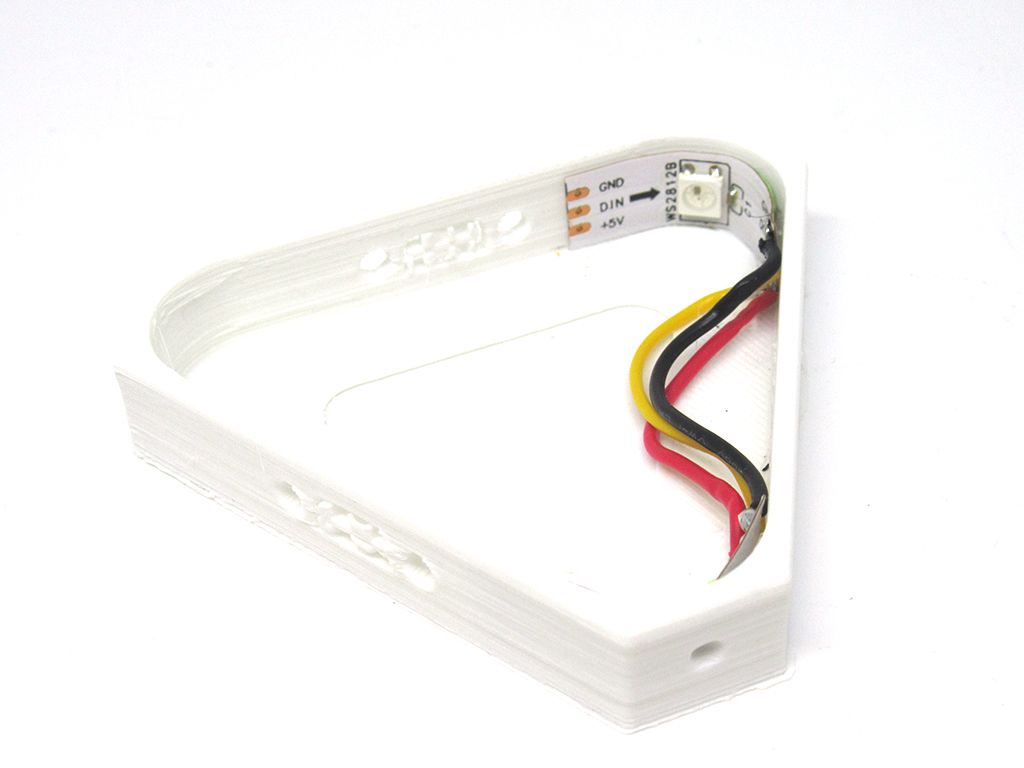
Cherie Tan / How-To Geek
Here comes the delicate part: soldering jumper wires between corresponding pins on the LEDs. Typically, these will be GND (ground), DIN (data), and 5V (power). Make sure to connect the LEDs in series, meaning each LED’s output connects to the next LED’s input (except for the first and last LEDs in the chain).
Double-check your LED strip’s specifications to see if any resistors are required when connecting them to the Raspberry Pi.
Here’s an exact guide on what to do, for clarity:
- When soldering LED connections, solder a jumper wire from the GND pin of one LED to the GND pin of the next LED.
- Then, solder another wire from the DIN pin of the first LED to the DOUT pin of the second LED.
- Repeat for the 5V pin as well.
- Finally, solder three wires to the other end of the third LED, but leave them unconnected for now.
It’s time to add the brain to your DIY Nanoleaf.
Step 4: Attach the Raspberry Pi and Loop Wires
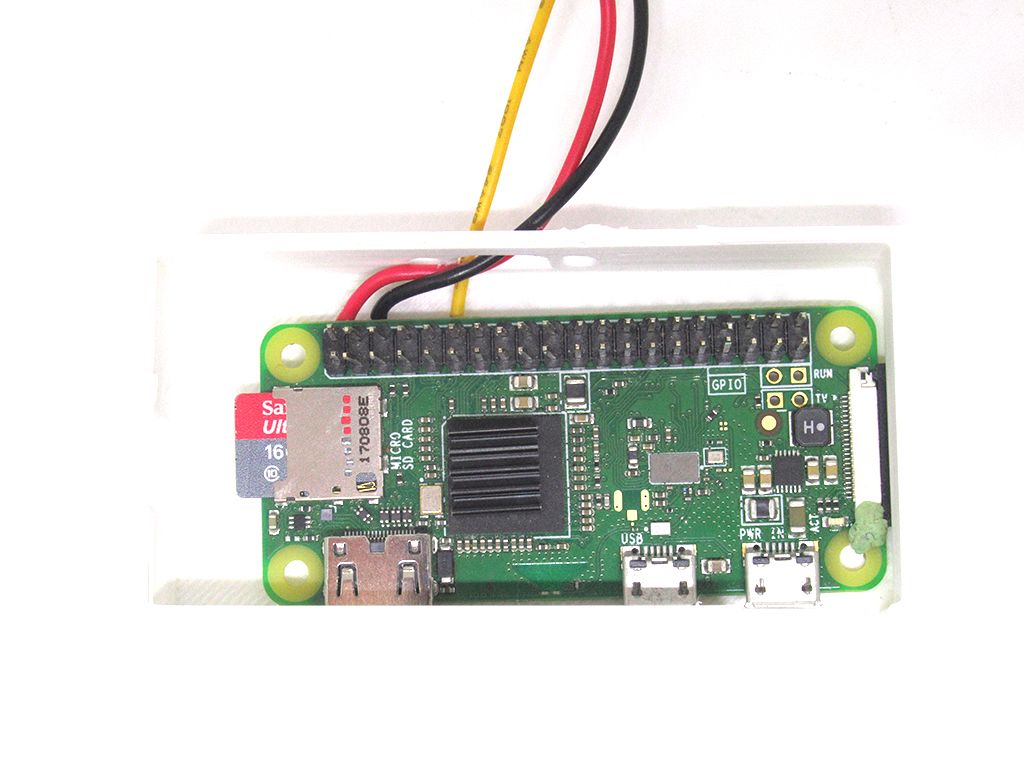
Cherie Tan / How-To Geek
Carefully place the Raspberry Pi Zero W inside the bottom enclosure, ensuring the LED wires can loop through the designated hole.
Now comes the time to solder the jumper wires to the Raspberry Pi’s GPIO pins. Consult the pin layout for your Raspberry Pi model (schematics available online at Raspberry Pi website ) and carefully solder the GND, 5V, and DIN wires to the corresponding pins (for example, GPIO 18 for DIN). Next, loop those three previously unconnected wires through the hole in the next enclosure. You’ll be soldering these wires to the fourth LED in the next step.
Step 5: Complete the Circuit and Add Diffusers
Repeat the soldering process from Step 3, connecting the three looped wires from the previous enclosure to the new LED. Continue this process for all remaining LEDs and enclosures, ensuring all LEDs are wired in series.

To diffuse the LEDs and create a softer light, we can use plain white printer paper. Trace the outline of the LED enclosure onto the paper and cut out the traced shape with slight adjustments to ensure a snug fit inside the enclosure. Place the paper diffusers inside the enclosures and snap the top components back on.
Now, let’s control those LEDs with some code!
Step 6: Program Your Pi With the Complete Code

Cherie Tan / How-To Geek
Now to program the Raspberry Pi, make sure you have set up SSH and launched a terminal window. Not sure how to do so? We’ve got a separate guide on configuring your Raspberry Pi if you need a refresher. Open up the nano editor with the following command:
sudo nano file-name.py
Then copy and paste the following code into the nano editor.
The code sets up a Raspberry Pi to control NeoPixel LED strips. It imports necessary modules: time, board, and neopixel. It defines functions for generating colors (wheel(pos)) and cycling through a rainbow effect (rainbow_cycle(wait)). The main loop sets LED colors sequentially to red, green, and blue, then calls the rainbow cycle function.
import time
import board
import neopixel
# Choose an open pin connected to the Data In of the LED strip, i.e. board.D18
# The LED strip must be connected to D10, D12, D18 or D21 to work.
pixel_pin = board.D18
# The number of LEDs
num_pixels = 9
# The order of the pixel colors - RGB or GRB. Some LEDs have red and green reversed!
# For RGBW LEDs, simply change the ORDER to RGBW or GRBW.
ORDER = neopixel.GRB
pixels = neopixel.NeoPixel(pixel_pin, num_pixels, brightness=1, auto_write=False,
pixel_order=ORDER)
def wheel(pos):
# Input a value 0 to 255 to get a color value.
# The colours are a transition r - g - b - back to r.
if pos < 0 or pos > 255:
r = g = b = 0
elif pos < 85:
r = int(pos * 3)
g = int(255 - pos*3)
b = 0
elif pos < 170:
pos -= 85
r = int(255 - pos*3)
g = 0
b = int(pos*3)
else:
pos -= 170
r = 0
g = int(pos*3)
b = int(255 - pos*3)
return (r, g, b) if ORDER == neopixel.RGB or ORDER == neopixel.GRB else (r, g, b, 0)
def rainbow_cycle(wait):
for j in range(255):
for i in range(num_pixels):
pixel_index = (i * 256 // num_pixels) + j
pixels[i] = wheel(pixel_index & 255)
pixels.show()
time.sleep(wait)
while True:
# Comment this line out if your LED strips are RGBW/GRBW
pixels.fill((255, 0, 0))
# Uncomment this line if you have RGBW/GRBW LED strips
# pixels.fill((255, 0, 0, 0))
pixels.show()
time.sleep(1)
# Comment this line out if you have RGBW/GRBW LED strips
pixels.fill((0, 255, 0))
# Uncomment this line if you have RGBW/GRBW LED strips
# pixels.fill((0, 255, 0, 0))
pixels.show()
time.sleep(1)
# Comment this line out if you have RGBW/GRBW LED strips
pixels.fill((0, 0, 255))
# Uncomment this line if you have RGBW/GRBW LED strips
# pixels.fill((0, 0, 255, 0))
pixels.show()
time.sleep(1)
rainbow_cycle(0.001) # rainbow cycle with 1ms delay per step
Save with CTRL+X and press Y for YES. Then run the code with sudo python3 file-name.py.
Once you’ve completed the above steps and connected the Raspberry Pi, it’s time for the moment of truth! Power on your mini Nanoleaf and watch as the LEDs illuminate.
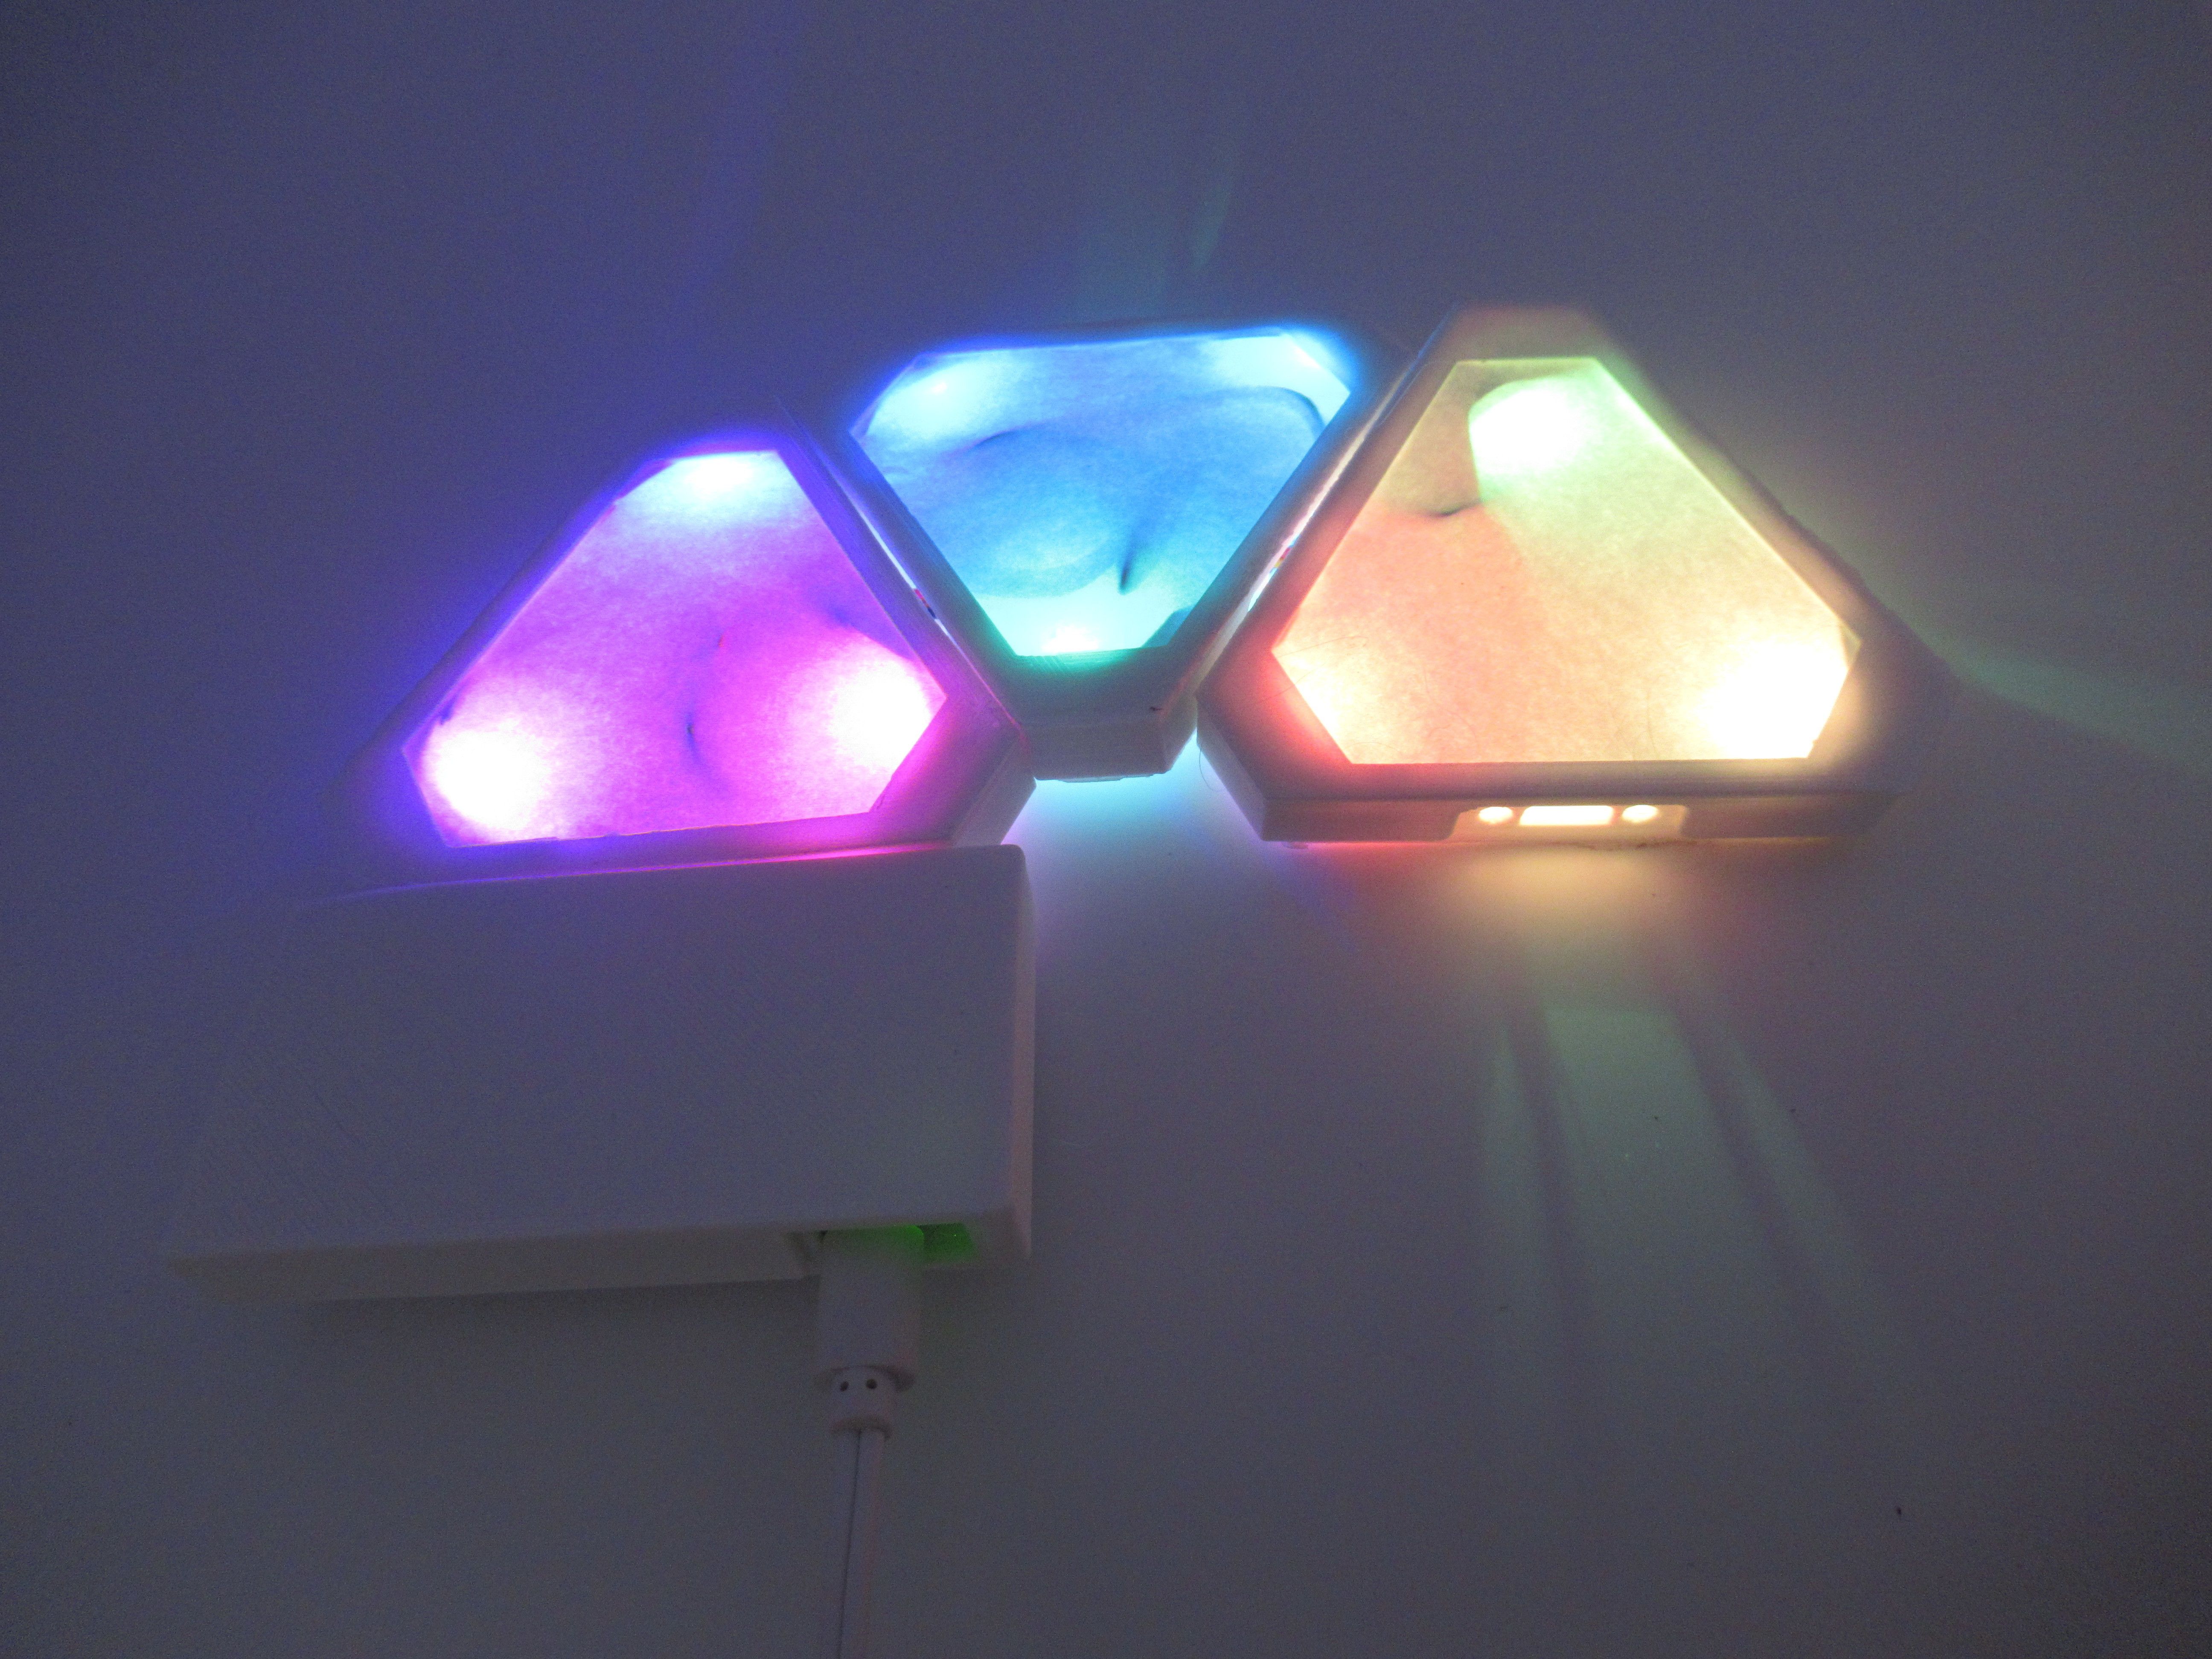
Cherie Tan / How-To Geek
This might involve individual colors like red, green, and blue, or even a captivating rainbow effect.
Additional Tips and Tricks
This is just the beginning of your mini Nanoleaf’s potential! Here are some other exciting ways to personalize your light:
- Light Up Your World Automatically: Want your mini Nanoleaf to adapt to the environment? Consider incorporating a light sensor into the circuit. This clever addition allows the LEDs to automatically switch on when darkness falls, creating an ambient and energy-efficient lighting solution.
- Expand Your Creation: Feeling ambitious? Why not expand your mini Nanoleaf by adding more LEDs and panels? This lets you create a larger and more elaborate display. However, keep in mind that additional LEDs might require a logic level converter chip, like the 74AHCT125, to manage the increased complexity. You might also need to upgrade your power supply to ensure sufficient energy for all the LEDs. A female DC power adapter would then be necessary to connect the upgraded power supply to your Raspberry Pi.
- Securing Your Masterpiece: Once you’ve made all the desired adjustments and customizations, it’s time to secure your mini Nanoleaf for long-lasting enjoyment. Using small screws and nuts, carefully fasten the panels together, ensuring a sturdy and visually cohesive final product.
With a little planning, effort, and this guide as your companion, you’ll be well on your way to crafting a unique and functional mini Nanoleaf that adds a touch of magic to your space!
Also read:
- [Updated] Adding Melodies to Facebook Clips Easy Methods
- 2024 Approved ASMR Quality High Standards Meet Affordable Costs
- Comprehensive Troubleshooting of Missing MSVCR110.DLL in Helldivers 2
- Discover the Must-Have Game in Yakuza: Like a Dragon
- HAVIT 5 Gaming Laptop Cooling Pad Review
- How to Bypass Google FRP Lock from Vivo Y28 5G Devices
- In 2024, A Quick Guide to Honor X50i+ FRP Bypass Instantly
- Madden '19 Critique: Excellent Functionality Beginning to Show Its Age
- Spotlight on Apple Watch Series 4: A Leap Forward in Excellence
- The Ultimate Guide to Assessing the Amazon Kindle Oasis: Beautifully Designed Luxury Device
- Tips of Transferring Messages from Motorola Moto G 5G (2023) to iPhone 14/15 | Dr.fone
- Unlock Savings & Convenience With a Kindle
- Unveiling the Features of the Barnes & Noble Nook Glowlight 3 - An Ultimate Guide to Your Next E-Reader Purchase
- Title: DIY Guide: Crafting Customizable Chroma Garden LEDs with Nanomaterial Technology
- Author: Scott
- Created at : 2024-12-05 06:33:01
- Updated at : 2024-12-11 07:38:27
- Link: https://buynow-info.techidaily.com/diy-guide-crafting-customizable-chroma-garden-leds-with-nanomaterial-technology/
- License: This work is licensed under CC BY-NC-SA 4.0.