Step-by-Step Guide: Moving Images & Clips From Your PlayStation 5 Console

Step-by-Step Guide: Moving Images & Clips From Your PlayStation 5 Console
Key Takeaways
- Share your gaming memories easily using the PS5 Share button & transfer screenshots and videos to your phone or USB drive for sharing or backup.
- Use the PlayStation app to quickly transfer captures under 3 minutes in length at less than 4K resolution to your mobile device.
- Alternatively, plug a USB drive into your PS5 console and copy screenshots and large videos to it for use on a PC or Mac.
The PS5’s Create button makes it easy to capture screenshots of videos while you’re playing, but this media doesn’t have to live on your console. Here’s how to transfer your gaming memories for sharing, backup, or simply to free up space.
Upload PS5 Screenshots and Videos Using the PlayStation App
Using the official PlayStation app to transfer screenshots and videos to your phone is probably the fastest and easiest way to share your media. This works for all screenshots and videos that are under 3 minutes in length at less than 4K resolution (you can adjust your PS5 capture settings on your console ). First, download the app for iPhone or Android and sign in to your PlayStation account.
Tap the “Game Library” icon in the bar at the bottom of the app, then select the “Captures” option near the top. You should see all of your recent captures appear. Download them to your device by opening them and selecting the arrow icon in the bottom right corner.
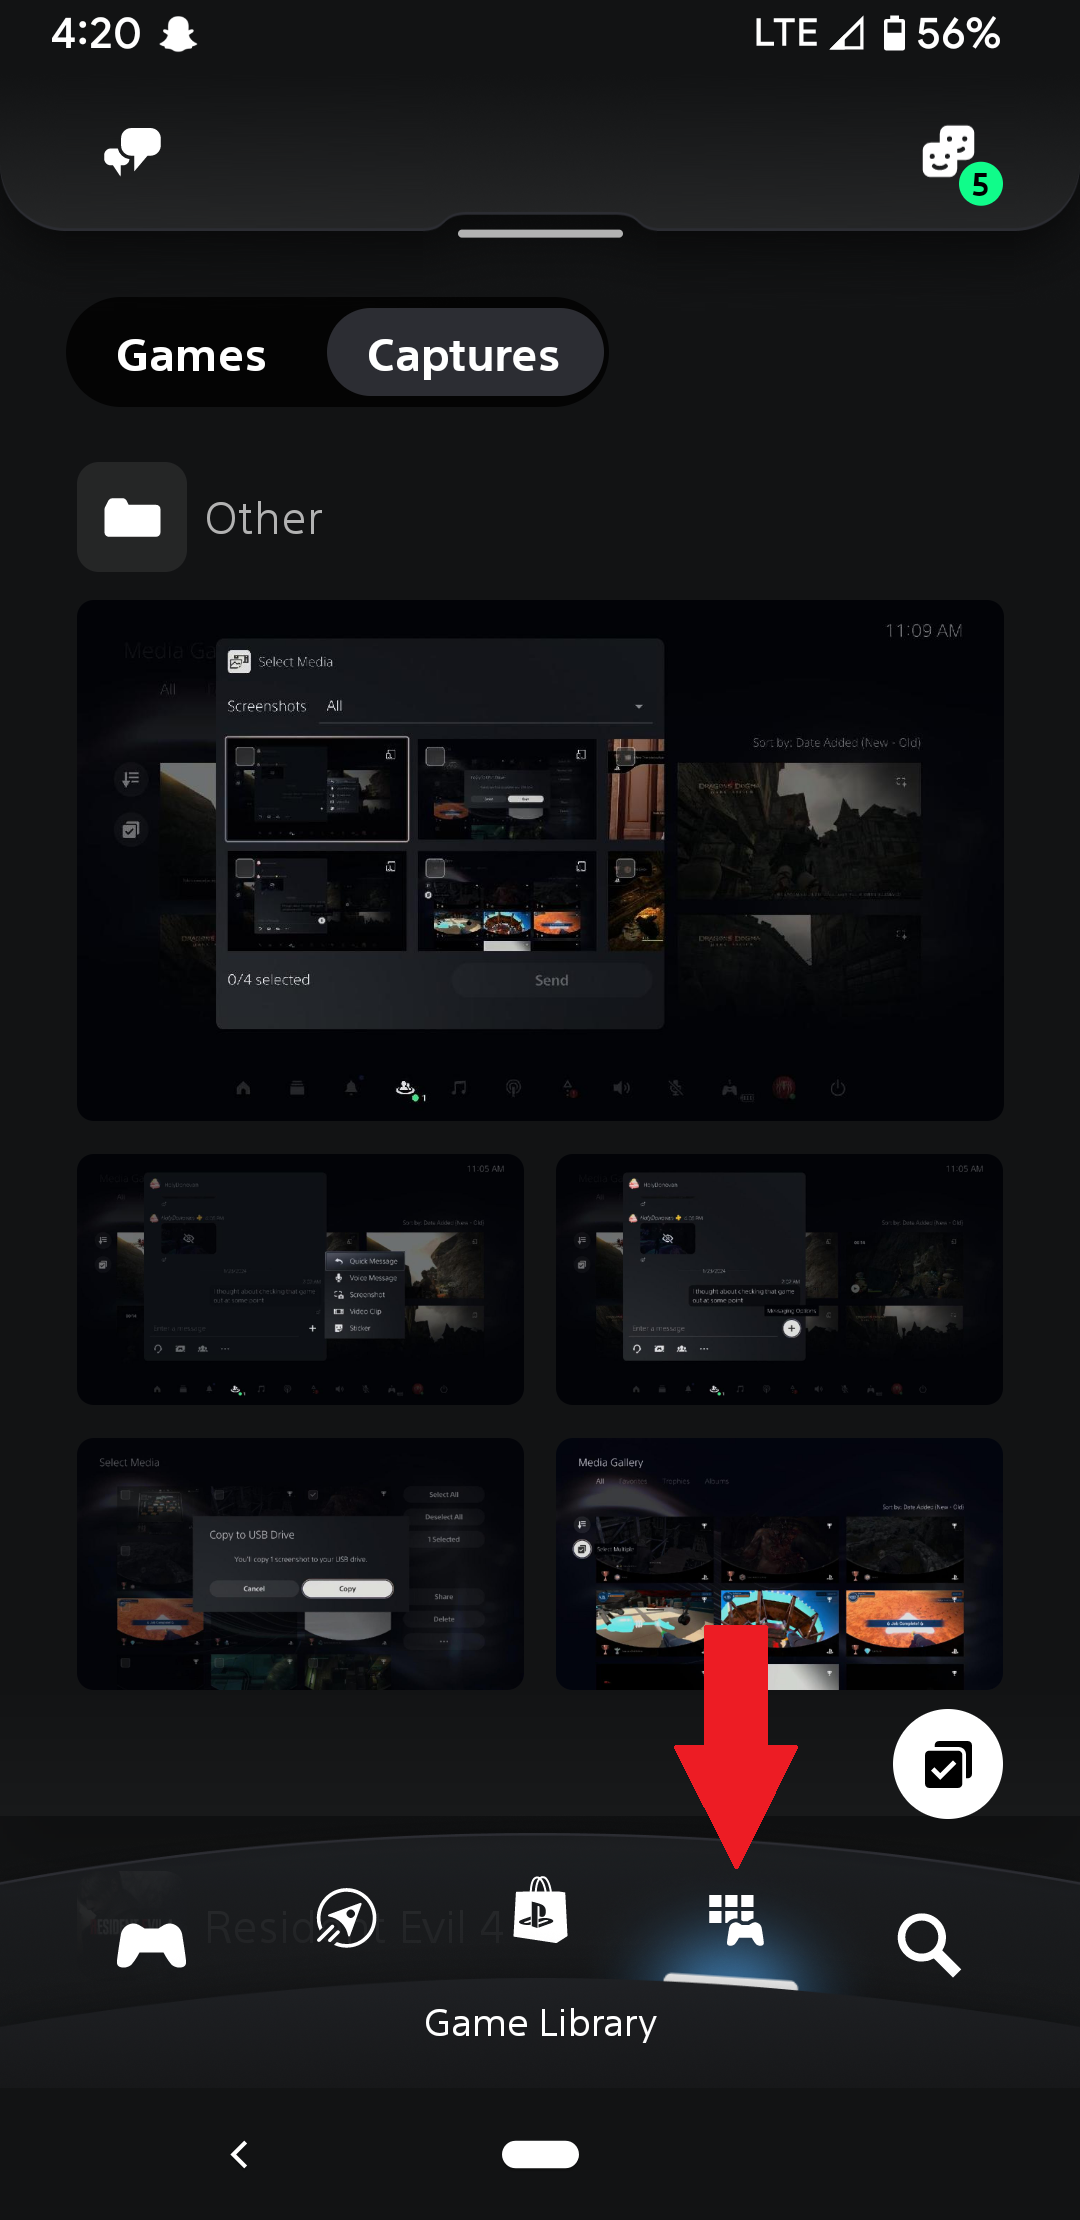
The PlayStation App only syncs captures made within the last 14 days, so any older than that will not appear unless you upload them manually from your console. To do this, launch the Media Gallery app on your PS5 and select a screenshot or video you’d like to upload and open it to full screen.
Use the three dots icon on the right side of the overlay to choose “Upload to PlayStation App” and your console will automatically queue the image them for upload. Your selected captures should then appear within the app in a matter of minutes.
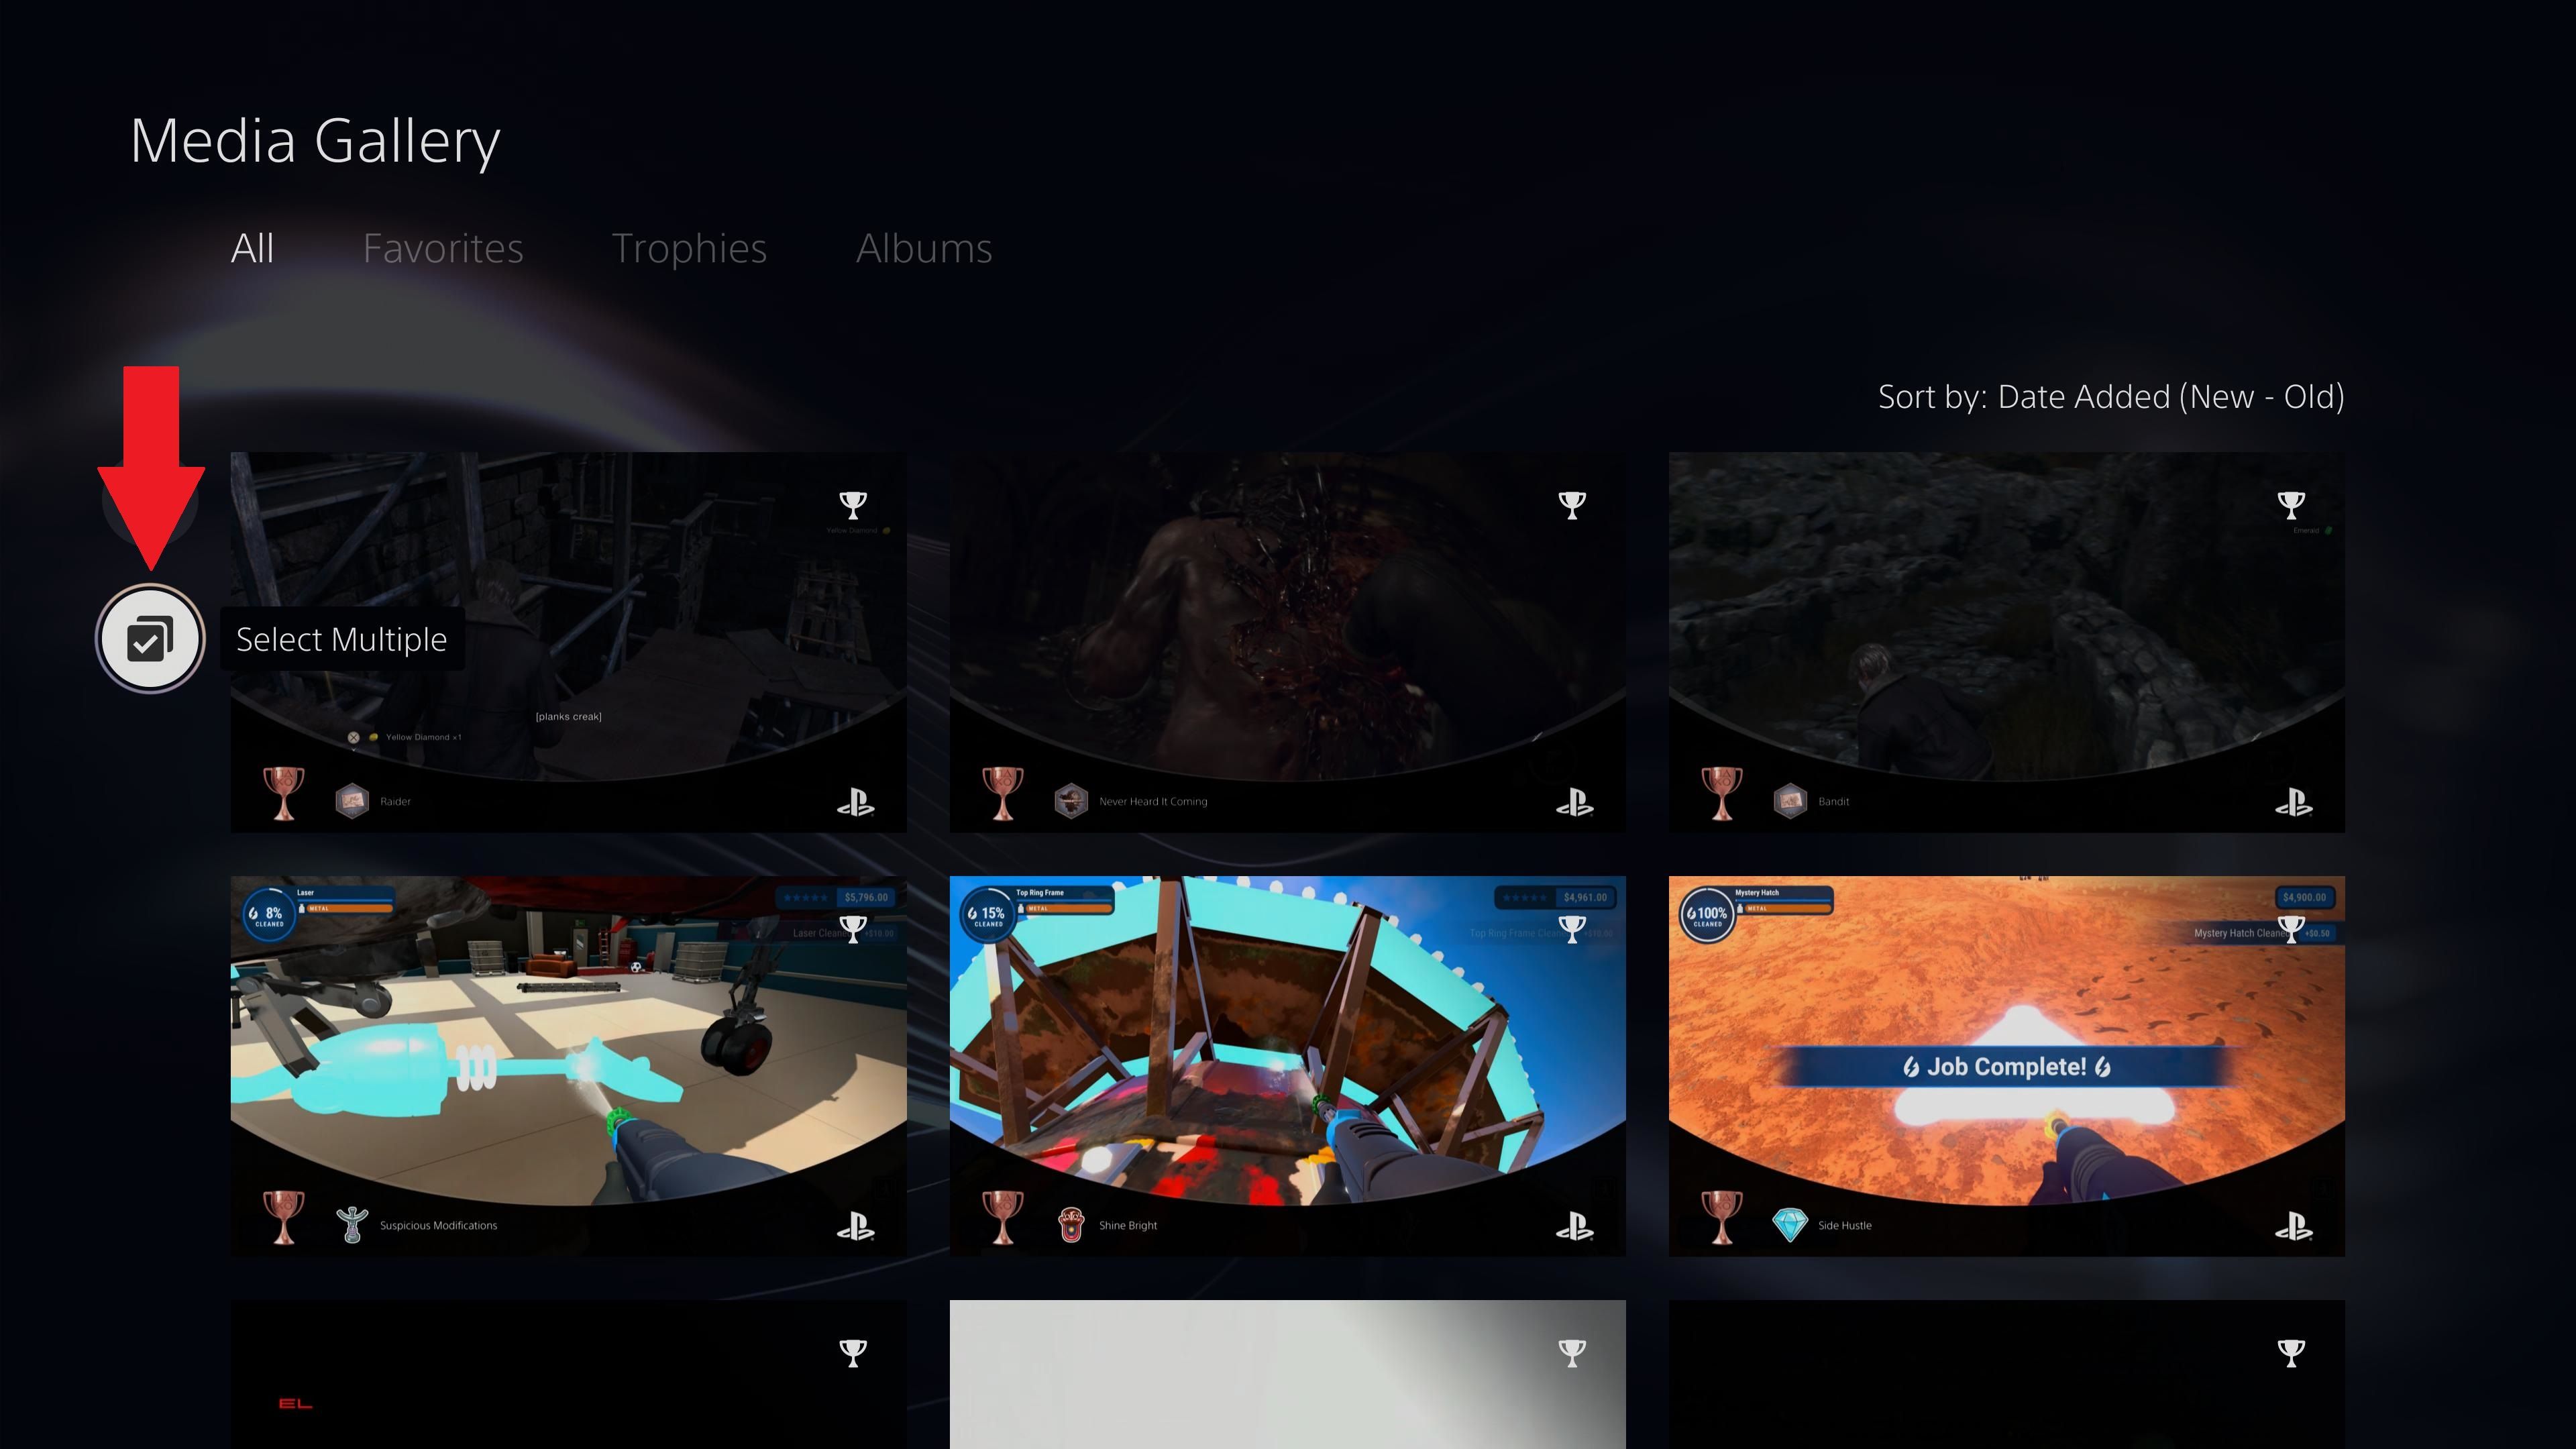
To upload multiple captures at once, select the checkmark icon on the left side of the Media Gallery that says “Select Multiple” and you can pick a series of captures to upload simultaneously. This option works for all methods described in this article, though for private messages, you need to select “Share” rather than the three dots at the bottom.
Copy PS5 Screenshots and Videos to a USB Drive
For easy transfer to a PC or if you’d prefer not to clutter your mobile device with game captures, you can also use an external USB drive. The process to do this is almost the same as uploading them to the PlayStation App, but it first requires an external USB drive, typically a flash drive .
Insert the drive into one of your console’s USB ports and then select the captures you want to share. You may need to format this drive using your PS5 under Settings > Storage > USB Extended Storage > Format as USB Extended Storage before it can be used.
Formatting a USB drive with your PS5 will destroy any data that is already on it. Make sure you’re happy to lose any data on the drive before you do this.
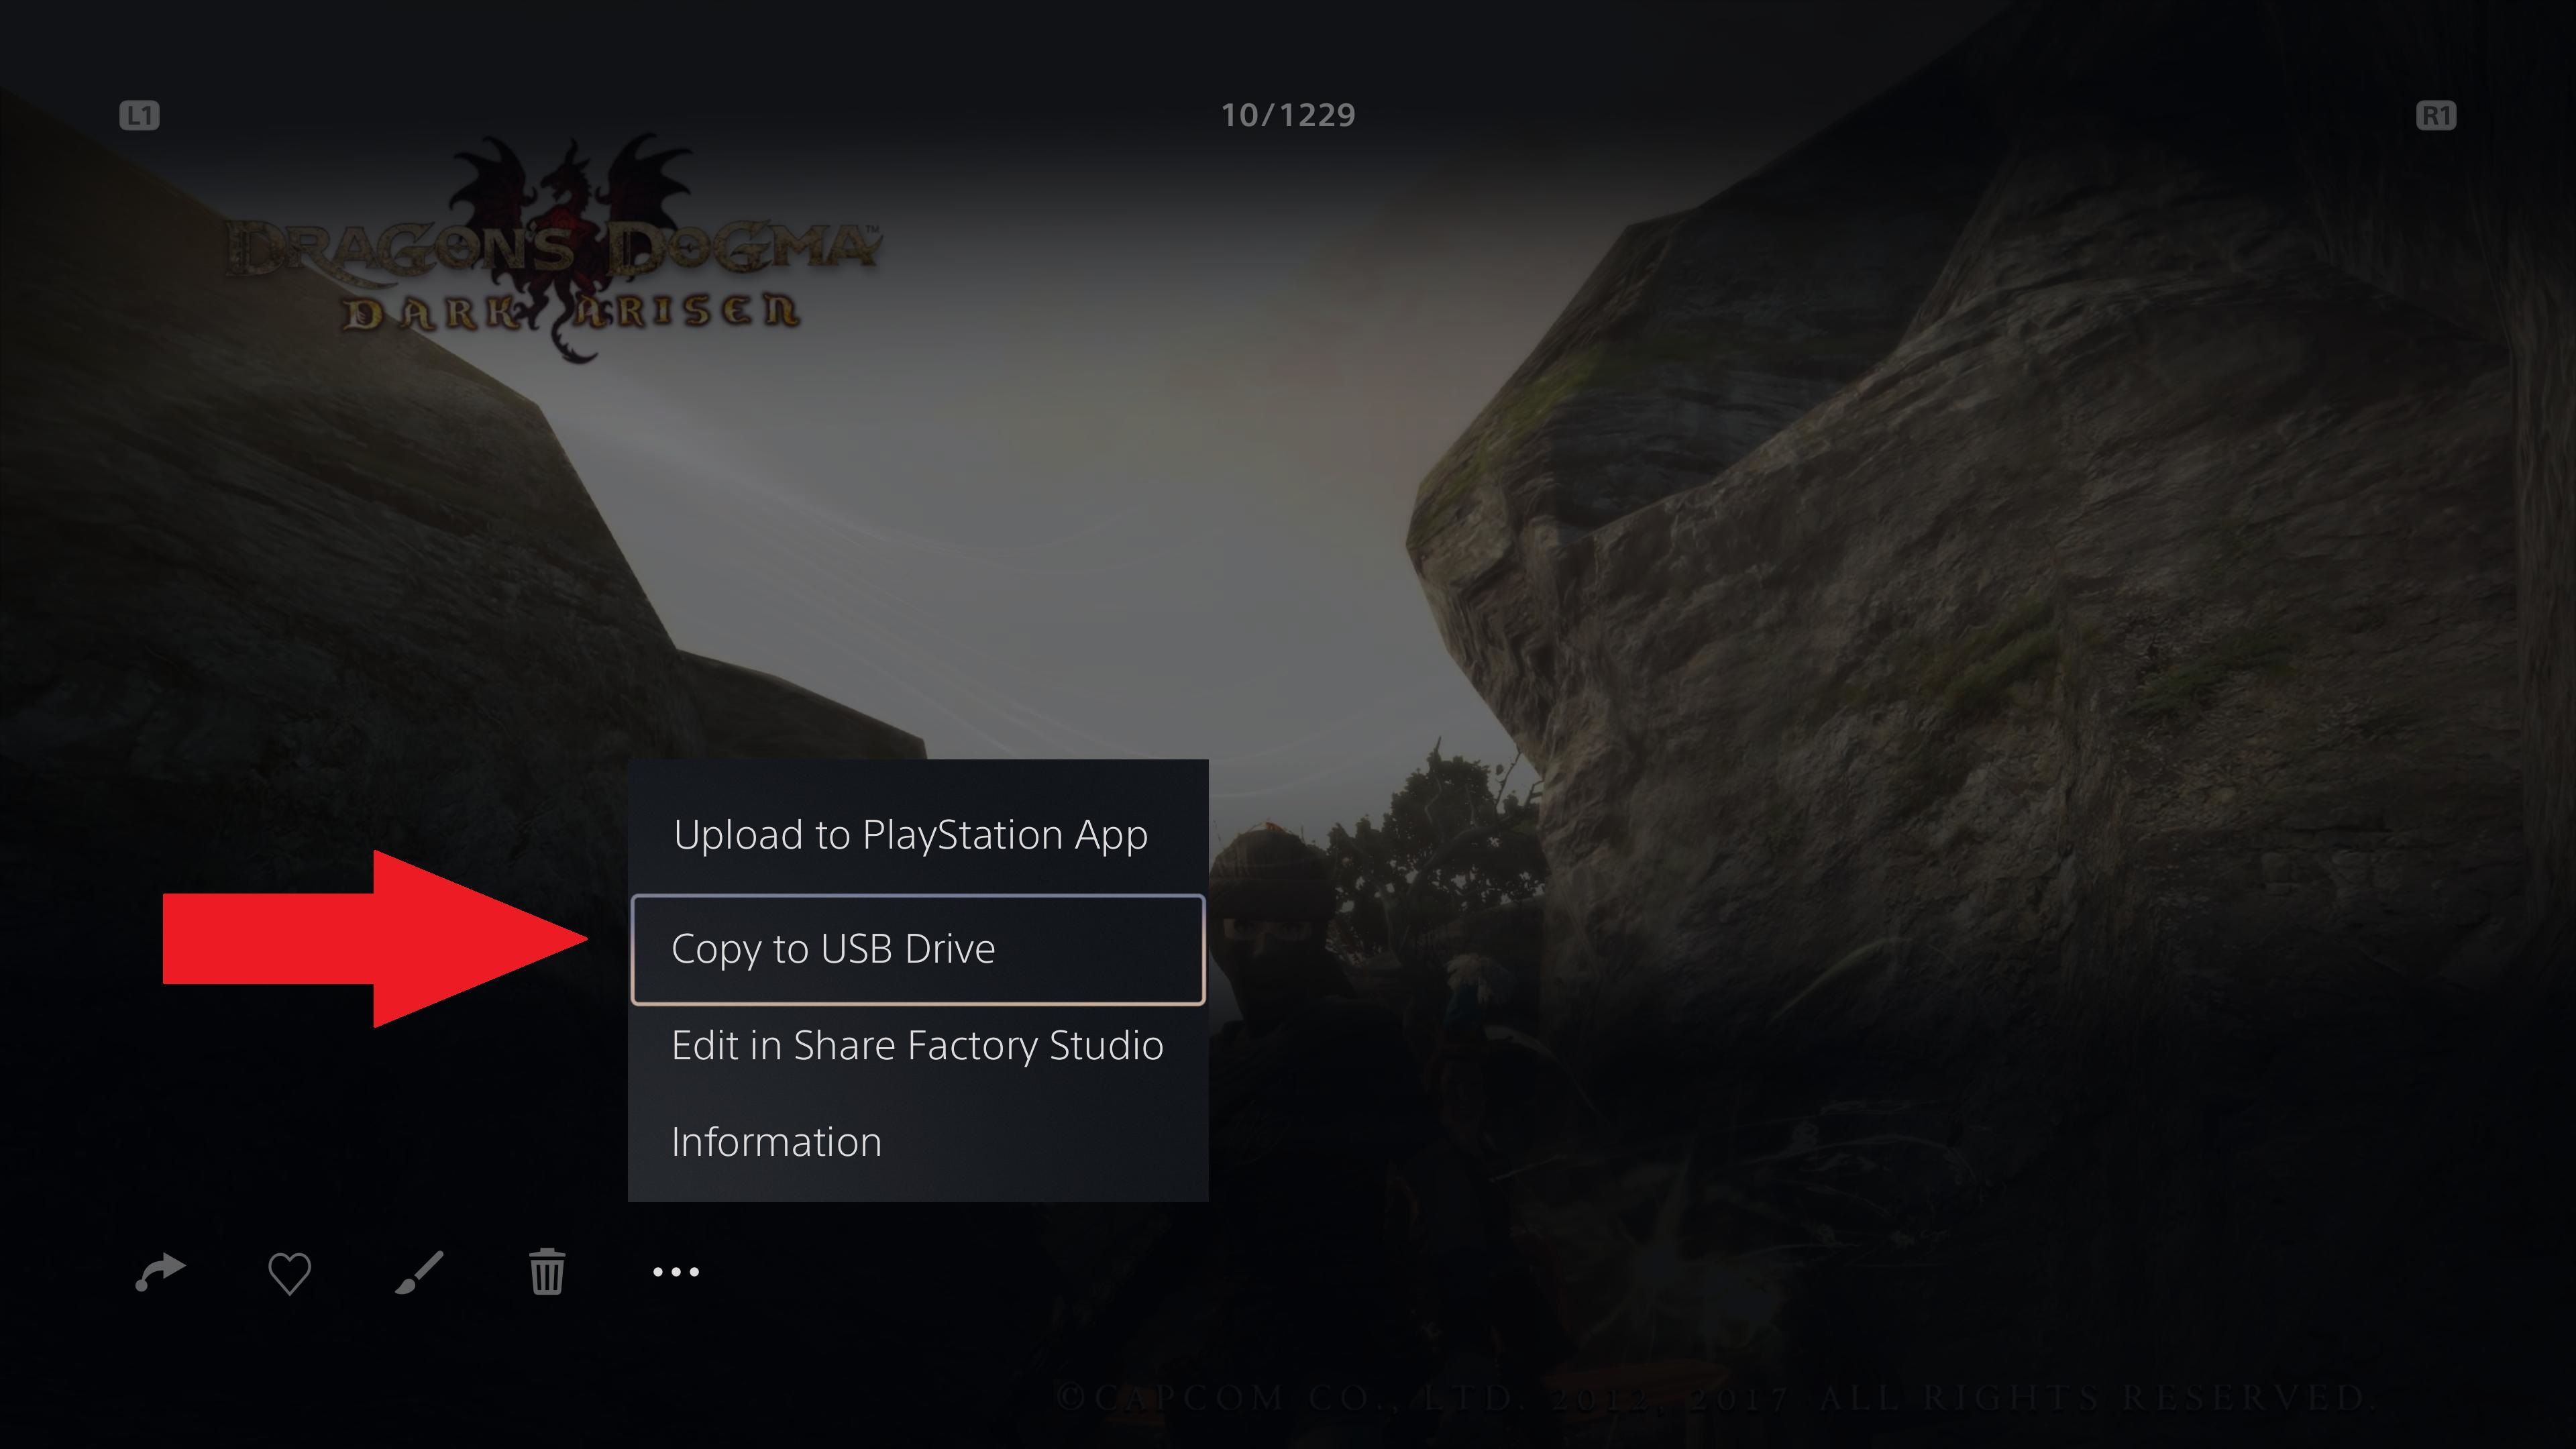
Launch the Media Gallery app and select the three dots in the bottom right corner and choose “Copy to USB Drive.” A pop-up will appear confirming the number of captures selected. Verify that you’ve selected the right amount of captures and then select “Copy.” The console should automatically begin transferring them to your drive.
With the transfer complete you can insert the drive into your PC or Mac to access your media. To do this, open File Explorer (Windows) or Finder (Mac) and navigate to the USB device’s storage.
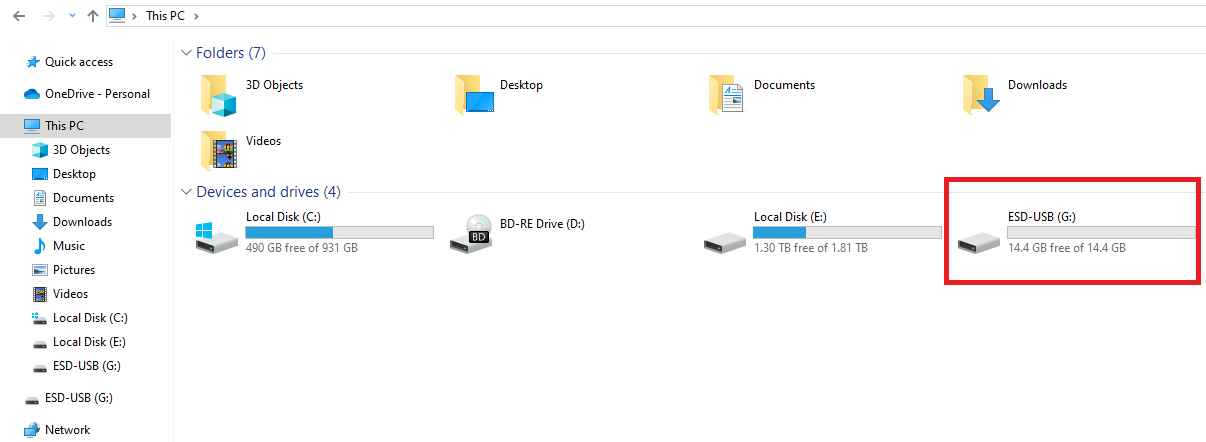
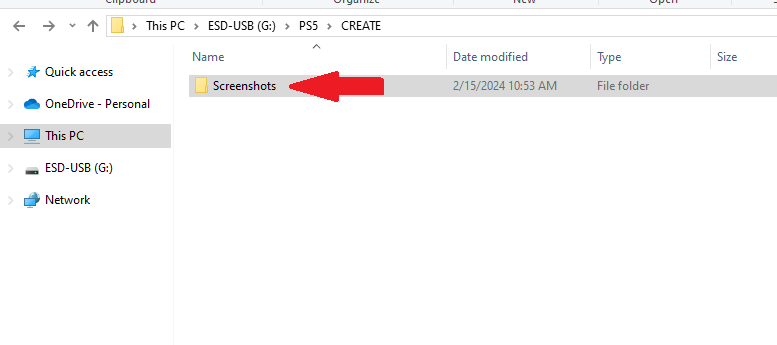
You should see a folder called “PS5.” Open it and then open “CREATE” > “Screenshots” and then find the folder named after the game from which you took your desired captures. This is where you will find your saved screenshots or videos and can then copy or save them to your PC directly or share them as you wish.
Gone are the days of taking blurry photos of your television with your phone and awkwardly sharing screenshots of your games on social media. Now, with just a few button presses on your PS5, you can share your gameplay experiences with the rest of the world. Most importantly, though, take as many as you can. Games are bigger than ever and many are downright gorgeous with the level the graphical fidelity on display.
If you’re looking for new experiences to capture your best moments, consider trying out some new games with a PlayStation Plus Premium subscription or check the free demos and other methods available on the PS5.
Also read:
- [New] 2024 Approved Navigate and Neutralize Your Own Overly Green Spectrum in YouTube Videos (Mac)
- [New] Accelerated Guide to Transforming SRT Into TXT Files
- [New] In 2024, Economical Options Best 11 Vlogging Gear
- [Updated] In 2024, From Followers to Earnings Instagram's Complete Guide
- Belly Laughs Ledger No-Fee Funny Templates
- Comprehensive Imo Chat App Evaluation
- Experience Vibrant Creativity with the Huion Kamvas GT-191 Artist Drawing Pad Reviewed!
- High-Definition Superzoom Photos? Canon SX70 to the Rescue!
- Mastering Slug Lines for Effective Storytelling for 2024
- Prime Day Specials: Unbeatable Deals on the Latest Samsung Electronics
- Reviewing the Next Generation with Netgear Nighthawk AX8 Router Range Extender: Perfect for Future-Proof Networks?
- Stay Ahead of the Curve with Cutting-Edge Health Gadgets: Best Fitness Tracker Innovations
- Step-by-Step Guide: Restoring Missing or Lost Partitions on Windows 10 & 11
- Step-by-Step Instructions for Perfect PS4 Webcam Setup
- The Creative Process Behind Developing the Iconic 3D Pipes Windows Wallpaper
- Tropico 6 Review: Oppressing A Tropical Paradise
- Ultimate Guide to the Philips Somneo Alarm Clock - Elite Rating & Features
- Unlock Your Potential: Sign Up for Enhanced ChatGPT Plugins Today!
- Updated In 2024, Live Chat With WooCommerce Leading Into the Live Selling World
- Title: Step-by-Step Guide: Moving Images & Clips From Your PlayStation 5 Console
- Author: Scott
- Created at : 2024-12-05 22:00:48
- Updated at : 2024-12-10 20:39:37
- Link: https://buynow-info.techidaily.com/step-by-step-guide-moving-images-and-clips-from-your-playstation-5-console/
- License: This work is licensed under CC BY-NC-SA 4.0.
